Here you can find information regarding the assembly of the Dodge Charger front end. In this guide we will cover the
essential repairs for the front end of this vehicle. Included within these repairs
is the inner and outer tie rod removal and change, the front wheel hubs installation, ball joint removal and
installation, the upper and lower control arms, and the front strut installation. Along
with the repair procedures we also include the corresponding bolt torque specs for each fastener involved. These
guides are intended to assist in each procedure to help diyers with the job.
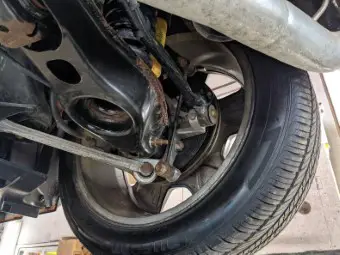
Dodge Charger Tie Rod Change/Removal
To install a new tie rod on a Dodge Charger you must first remove the old one from the vehicle. This can be
done by raising the vehicle up by either the use of a floor jack or a vehicle hoist.
Once the vehicle is in the air you can remove the corresponding tire for the side that you want to change the
tie rod on. Once the tire is off you can now access the old tie rod and remove it for replacement. On this vehicle the
tie rod is apart of an entire rod system which controls the steering of the vehicle. If any of the steering rods are loose
be sure to replace them appropiately. The outer tie rod itself connects with another inner portion of the rod through the use
of an inner tie rod. This inner tie rod screws into the power steering rack and can be torqued down to 55 ft-lbs.
Be sure to inspect and measure your old tie rods so that the new ones can be installed
correctly. Whenever steering components are changed I recommend having an alignment done after the job to ensure the vehicle is in good
functional condition. When putting the tie rod onto the vehicle the tie rod end nuts get tightened down to 26 ft-lbs plus an additional 90 degree turn.
Be sure to install new cotter pins to ensure that vehicle safety is maintained.
Dodge Charger Outer Tie Rod End Torque Spec : 26 ft-lbs + 90°
Dodge Charger Inner Tie Rod Torque Spec : 55 ft-lbs
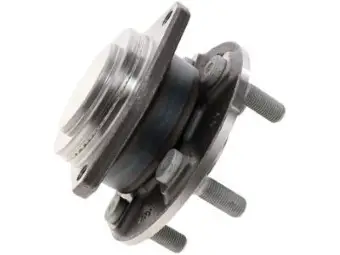
Front Wheel Hub Installation
The front wheel hub on the Dodge Charger tightens down to the steering knuckle through the use of a single centered nut and 4 bolts from the rear.
In order to remove the
old part from the vehicle you will need to jack your car up and remove the wheel on the side you are working on. From here we can then begin to
remove the braking system by taking off the caliper and brake rotor and then remove the center axle nut which holds the wheel hub to the steering knuckle. Followed
by removing the 4 bolts which hold the back of the wheel bearing assembly to the steering knuckle. These bolts go in from the back so you may need a swivel and some extensions.
With the nut and bolts removed the wheel hub should be removable from the knuckle. You may need to tap it with a hammer in order to loosen it up. Once loose simply
remove it from the suspension and place the new wheel hub in its place. From here you can hand tighten down the center nut and 4 bolts and then torque the nut to
152 ft-lbs and the 4 bolts to 50 ft-lbs. Lastly we can reinstall the braking system and eventually the tire. Be sure to refer to the braking section on this website for torque specs regarding
those componenets.
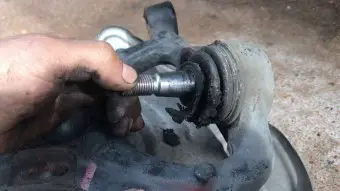
The Dodge Charger has 3 front ball joints being one upper and 2 lower ball joints. All of which connect their corresponding control arms to the
steering knuckle. For removal you can either press out the old ball joints and press new joints in or you can replace the entire control arm along
with the frame bushings and ball joint. When removing the entire control arm please refer to the control arm section within this webpage.
When installing the new parts be sure to torqued down the upper ball joints nut to 35 ft-lbs and the lower ball joints to 55 ft-lbs.
Each ball joint will have a corresponding cotter pin that will need to be installed to ensure safety of the vehicle maintains.
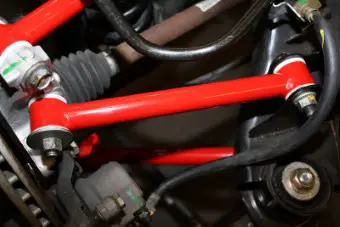
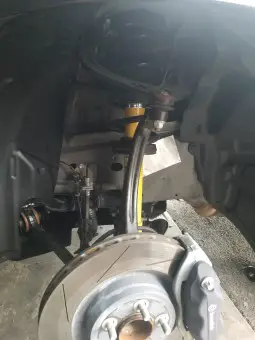
On the Dodge Charger there are 2 control arms which aid in the vehicles suspension and handling. On this particular vehicle there is the use
of both a strut and upper control arm. When removing the upper control arm be sure to remove the weight of the vehicle from the suspension and go ahead and
loosen and remove the upper ball joint from the steering knuckle. You may need to use an air hammer or a pickle fork in order to remove as it tends to
corrode in place. Next you can remove the 2 frame bolts which holds the upper arm to the vehicle frame. This can be done by accessing one side of the bolt
from the side of the car and the other from underneath the hood next to the coolant reservoir and brake master cylinder. With the 2 frame bolts removed the
old upper arm can be removed from the vehicle and the new upper arm can be placed into its location and hand tightened down. Once ready be sure to torque down
the upper control arm frame bolts to 55 ft-lbs. The upper ball joint nut can be torqued down to 35 ft-lbs plus an additional 90 degree turn. All suspension torqueing should be done at ride height.
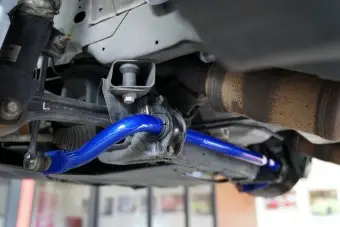
Lastly we have the lower control arm which much like the upper arm has 2 frame fasteners and a single ball joint for each arm which attaches to the steering knuckle.
When removing the lower control arms you can start by removing the frame fasteners that hold the arms to the frame and depending on which arm also the lower strut
bolts which attaches to the rearward lower control arm. When installing the new arms be sure to torque down the frame side bolt to 130 ft-lbs and the lower ball
joint to steering knuckle to 50 ft-lbs plus an additional 90 degree turn. The lower strut bolt gets tightened down to 128 ft-lbs.
To replace the front struts on the Dodge Charger you will need to lift the vehicle up into the air and start by removing the tire on the side you want to replace.
With that removed we can now remove the bolts and nuts that hold the strut to the vehicle frame and lower control arm. Starting
with the single lower bolt which holds the strut assembly to the lower arm. Simply remove the nut from the bolt and then lightly tap the bolt out of
the lower arm assembly. Be sure not to damage the threads on the bolt as they will need to be reused when installing the new strut into the vehicle.
With the lower bolt removed we can then remove the single nut which holds the stabilizer bar to the front strut. With that remove we can move to
under the hood and remove the 3 nuts which hold the upper portion of the strut to the vehicles frame and the upper control arm.
With the upper 3 nuts removed and the upper ball joint nut taken off the old strut assembly
should be able to be removed from the car. The new strut assembly can be placed into the location of the old one and the upper nuts can be hand tightened.
Before torqueing down any fasteners be sure that everything is first hand tightened. The lower bolt can then be installed and hand tightened up along with the
stabilizer endlink nut. From here we can torque down the upper nuts to 20 ft-lbs and then the lower strut bolt to 128 ft-lbs. The stabilizer
endlink can be torqued down to 27 ft-lbs.
The front swaybar on the Dodge Charger consists of a series of brackets that hold it to the frame of the
vehicle and a couple of endlink nuts that fasten it the the outer side of the car. To remove
the swaybar you will need to jack up the front of the vehicle and remove both the endlink nuts as well as the
brackets. To install the new swaybar you will need to move it back into the place as the old one
and torque the endlink to the strut down to 75 ft-lbs. From there you can tighten down the stabilizer lower nut to 96 ft-lbs.
and then torque the bracket bolts to 45 ft-lbs as well.
Dodge Charger Front Swaybar Bracket Torque Spec : 45 ft-lbs
Dodge Charger Front Swaybar to Strut Torque Spec : 74 ft-lbs
Dodge Charger Front Swaybar to Bar Torque Spec : 96 ft-lbs